My feedback on work for the Weber
[NOTE 8 Dec, 2009: JETTING
I am using an LC-1 from innovate with a gauge to read the exact air fuel mix (AFM). I have this connected to the exhaust of the front cylinder, but can swap to the exhaust for the rear when i want. So far I have made carb changes and test rode maybe 20 times and with numerous more garage tests for idle setup affects.
With my setup and the factory F27 ET the air fuel mixture variation goes from a little rich to a little lean 12s - 13.5 or 12.5 -14. This is possible with the F27 and with enriched jetting if the idle is adjusted.
That range though is a little too much, so I started work testing other ETs and filling holes and drilling them for custom F27. In the process, I also arrived at 12.8 - 13.2 AFM as a really nice riding feel, where the bike becomes light yet powerful- so that is where my goal is.
I think I have come up with a custom ET that evens out the AFM mix across all speeds/rpm with a smaller range, but need to do more testing to be sure (I have tested this at two different times for low speed testing and high speed. In theory, I have it dialed in nicely, but need a full ride at all speeds to be absolutely confident). I have an overheating problem I am working on fixing before I can do that. (9 Dec, 2009)
One I dial in the front cylinder, I will also test the rear cylinder to work out how the jetting should be adjusted. I think the bend in the manifold to the rear cylinder causes a drop off of fuel in the mix as it travels to the combustion chamber. It needs richer jetting, whatever the explanation. It could even be the ET wave (~) may be different for the rear than the front cylinder.
Then I will come back to the airbox. I am using a closed one at the moment. The airbox affects the AFM, so I want to test the effect of opening up an airbox with better jetting and measure the AFM effect. Well, I have done that at low speeds and surprisingly found it goes richer at low speeds when you semi-open up the lid by .5 AFM. At speed- I have not tested yet. END NOTE 9 Dec, 2009]
I have had help from JWilliam and Higgy whose knowledge far exceeds my own and to all the posters on the subject on this forum – just great. There is also a forum
http://www.ferrarichat.com/forum/ where is there is detail on Weber tuning by mostly Ferrari owners.
[b]My preliminaries for intakes and exhaust are:
b.1 fuel pressure at carb ~3psi set by adding a Holley 12-804.
b.2 Termignoni exhaust
b.3 closed air box with one air intake pipe.
b.4 itg filter, also similar affect with K&N filter
b.5 engine venting filter, which goes on airbox outlet by battery, and therefore plugged venting tube to carb airbox. This meant engine fumes are vented to the atmosphere and not back into carb airbox affecting the AFM reading.
b.6 Electric mod for good voltage to coils, to makes sparks strong (see mod on this site)
b.7 coils replaced, to makes sparks strong (see mod on this site)
My carb settings based on air/fuel mixture guage readings are:
I am at sea level and warm - hot air temperatures.
- float level 42 (factory setting)
- Venturi 36 (factory)
- Main Jet: testing
- AC jet: testing
- Idle jet: 65 (Factory)
- ET custom F27
- Accelerator jet: 35 (Factory was 40)
- Auxiliary venturi: 4.5 (Factory was 3.5)
Recommendations: It seems, Engines are all a little different and the setting will need to vary according to weather, altitude and your riding preference. The investment of an LM-2 from Innovate would be well worth it - then test stepping the Main and AC jets up and down from a proven cluster. Your own weather, altitude, fuel pressure, air intake, exhaust output will affect adjustments.
Fuel pressure and float settings are sensitive ie they will affect the tuning if adjusted slightly, so get this right first as well as settling on your air intake and exhaust system. You might need to step one jet size up or down from my preferred cluster.
Here are some things I learned:
1. The float level matters, start at 42 mm factory setting. If in the end you want everything a little bit richer increase the setting to 40mm.
2. You might have an open airbox, but maybe a better way is to keep it closed factory with some intake pipes gently feeding air in when you have a little speed.
3. When the jetting is not right you get uneven fluctuations and get confused. It is like whistling - if it is not tuned right it just doesn't work. getting it right is about getting the cluster right (air intake, fuel pressure, exhaust, float level, Idle jet, accelerator jet, venturi, aux venturi, main, AC, idle jet, ET, manometer venturi balancing, idle screws set).
3. The factory venturi size is big for performance at speed, which means it needs care to tune the low end - but if you can do that you get best of both worlds. Changing the aux venturi for 4.5 is a clear improvement.
4. To take off the top of the carb jam a socket onto an allen key and undo nuts by putting allen key though holes in top of air box. Also because the nuts are fiddly lay a rag over the motor in case you drop a nut.
5. Want to put the AFM richer a bit - go up one main jet size (which is 5), for the same result it takes ~ 3 steps (which is 15) down in size of the AC jet.
6. petrol has changed. There is a need for a new cluster to tune the bike right.
7. Using an Air fuel meter like the LC-1 or LM-2 from innovate gives you the confidence to test effects of tunign variations.
See the work, below:
Fuel: Premium unleaded
Fuel pressure
I tested adding a Fuel Pressure regulator, learning that for a 906 it is not needed (the 906 tank return line is different from the 750, so pressure to carbs is different). I found pressure at carb at 1.5 – 1.8 psi, which I understand is acceptable. [Edit Aug 09: But I was concerned the low pressure may underdeliver at high speed when the demand is gretaet. I went to a holley for 3psi and reduced pulsing. Pulsing can also affect the float level, apparently.
Air intake system
I added an itg filter (also had K&N Filter DU-0900), which on its own made a big power increase with open air box. After that I taped up the holes in the lid and attaching some flexi piping (TPR 40mm heat resistant flexible piping ) to the left hole, twisted forward. I now have two rubber pipes out and facing forward from the holes in the bottom of the airbox. One is longer going forward to behind the radiator. This encourages air intake flow when driving. I learned that an open air box gives acceleration power, but at high speed the carb can do with even more air, so maybe closed airbox lid and thinner racing filter with closed lid better for high speeds. I also found the closed airbox gives a leaner AFM setting on idle, by half a point, than an open airbox, So closing the airbox does not choke the air off.
Electrics
For a noticeable improvement to spark plug firing (now hardly any or no missing when first starts) I added a relay to get a more direct 12 volt feed to the Coils.
http://www.geocities.com/davidhooau/pas ... _mods.html the one refereed to as the "Main Feed relay". I followed the instructions, except I made crimp connections rather than soldering. I rode the bike with the relay before I changed the coils and already there was a very noticeable improvement.
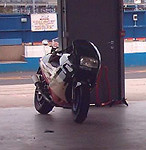
I then changed the coils for Japanese ones with 3 ohms resistance (my Honda 250 coil choice from the wreckers, was a bit tricky because the leads were different and I had to change the lead fittings (guy at wreckers checked 3 ohms with multimeter). I found a bike frame engineer to make me up two brackets for the coils, so they attached nicely to the same places on the frame. You can see one of them here:
Notice the mini fuel tank - enables some checking with the motor on and then to make adjustments without taking the big tank on and off.
I am also going to try some Iridium spark plugs.
Weber 44 DCNF 119: To the heart of the matter

.
I ordered from
http://www.piercemanifolds.com/ Tall aux venturis 4.5 (up from 3.5), some main jets, AC jets and idle jets to start testing, using the LC-1 to measure the Fuel Air Mix (AFM).
I ordered a maintenance kit (Weber 40-42-44 DCNF Carburettor Kit) in my case from MLP Carburettors -
http://stores.shop.ebay.com.au/MLP-Carb ... QQ_armrsZ1 To change aux vet: Took off air box, covered engine vent intake hole hole inside air box with tape and stuffed rag in venturis to avoid dropping nuts down them.Also put rag under airbox incase I dropped nuts that way. Undid bolts holding venturi on (top of air box has plug holes, so removed and used socket with allen key jammed in to undo bolts). Lifted venturi bits and air box off. Took off fuel hose. Undid 4 bolts at top of carb, to lift off top of carb, being careful not to damage float. Undid the 4 bigger bolts at base of carb, slipped accelerator cable off the ball joint. Now can handle carb on my knee on chair beside bike (still is attached by the choke cable). Used handy wooden bits as dowel to tap out aux venturis and tapped new ones into place.
NOTE: (As per comments on this thread by "Higgy" and Nicola aka "Dukapaso"), I made a water vacuum tester to check both carbs are timed together.
I ordered an LC-1 to measure air fuel mixture (rich/leanness) at different speeds/rpm so I can test the jetting accurately.